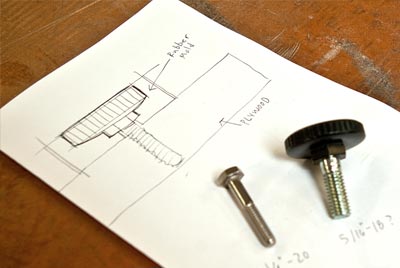

Levelers screw into the legs of a table base, which can be adjusted so the table doesn’t wobble. I have two of the herman miller contract bases, but one was without levelers. I thought the levelers from the one would swap over to the other, but the thread size and pitch is different between the two bases. I’m sure you can buy new ones, but I don’t know where, so I used one to make a rubber mold so I can cast 4 more with different hardware. The newer base uses 5/16″ – 18 threads, while the older base uses 1/4″ – 20.
First step is to make a rubber mold of the mount. The sketch below shows how I planned to do that:

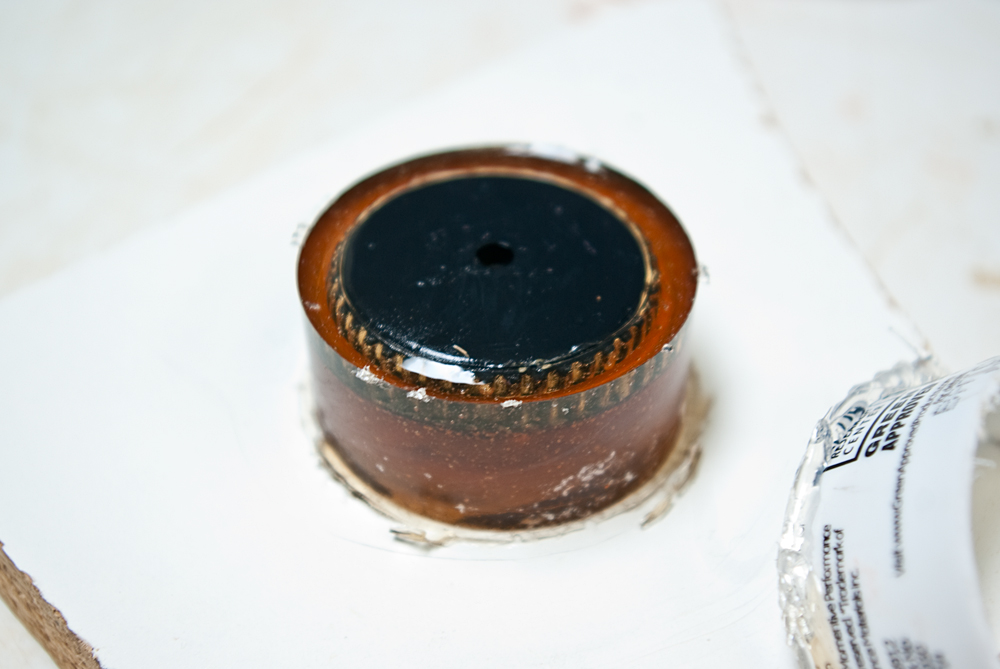
Drill a 5/16″ hole in a piece of scrap melamine and then thread the leveler into it.


Cut a length of tubing from a tube of caulk to use as a form wall. It should be just taller than the leveler.

Glue the tube in place, around the leveler, with hot glue. Spray some mold release inside and then the form is ready to cast.

Mix up the mold rubber, 1:1 by weight in this case, using polytek 75-60 polyurethane.

Pour the rubber into the form, just up to the edge of the leveler, and then let it cure.

Trim away excess ruber from the top of the mount, remove the tubing, and then grip the rubber tight and unscrew the whole thing from the base board.
Now the only trick is to figure out how to ‘float’ the new screw in the mold.

The easiest way to do this is to wrap the 1/4″-20 x 1-1/2″ stainless bolt with tape and then shove it in the mold. Set the depth of the bolt head so it will be cast inside the resin, then caulk the thing with silicone so it stays in place. I’ve put the rubber mold back in the sleeve so it won’t deform.

For this casting I’m using polyester resin for fiberglassing. I’m not sure how durable it will be, but it’s pretty hard, like the original leveler, and it can be pigmented black. I mixed up 20 grams of resin, added about .8 grams of black pigment, and then 8-10 drops of hardener. Stir the pigment in first, then add the hardener and stir it up again, then you can pour the form.


Overfill the mold so you can shape the bottom of the leveler to more closely match the convex surface of the original. Otherwise it will be flat on bottom, which will probably work fine, but the original leveler is convex on the bottom with a small hole drilled in the center.
 After about 2 hours, the part can be removed. I sanded the new part to remove some imperfections, but it came out pretty close to the original.
 Test fitting the leveler shows that it’s still a little bit longer than the original. To fix this, I will either extend the threads on the bolt and cut off a bit at the end, or try to cast the bolt deeper into the resin, so the leveler will be a bit more flush with the end of the table base. It sits out about 1/8″ more than it should. Not really a big deal, but I’d like it to be closer to the original leveler than it is.

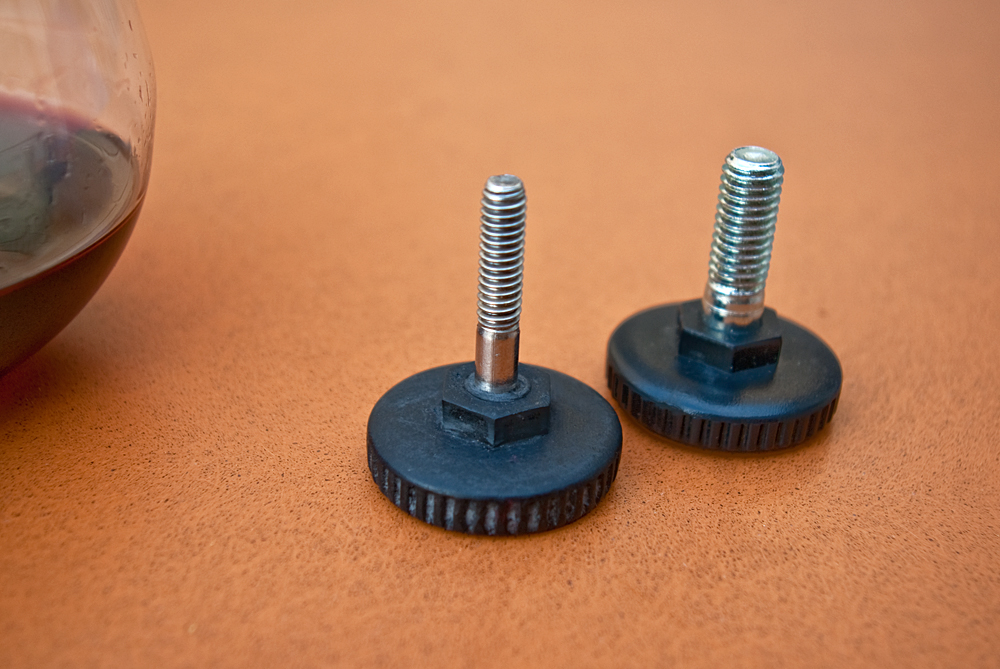
In this last photo you can see that the threads on the left leveler start lower than the one on the right. And the threads on the right leveler are taller than the original. Also you can see that the base isn’t domed enough, it’s too flat on the bottom. But not too bad for the first attempt.
