
I waited an extra day to demold the tabletop because it’s so thin and I wanted to minimize the chance of it breaking. It was covered in plastic to keep the moisture inside and demolding was pretty simple actually. First the form walls and base board are unscrewed, and then the walls and liners can be removed.


Before flipping it over, the edges are sanded down so they don’t spall and chip out.

The casting turned out just fine, but there’s a weird spot in the middle of the table. I didn’t bother cleaning the form with denatured alcohol because I knew I was going to grind it anyway. The rest of the darker spots are from water that was on the back side. There are three small spots visible because the base board was re-used and I didn’t fill these holes perfectly. I thought these spots would disappear after polishing, but unfortunately I didn’t polish down deep enough to remove them as planned. There are two spots on the edges where the liners were seamed together, and they will also be forever visible, but it’s ok.


I didn’t take many photos of the polishing process because it’s very messy and wet and I was too busy working. These polishing pads are a 4-step system, and I started with the most coarse pad to get rid of the uniform color and expose the fibers in the mix. Before polishing the top, I flipped it over again and polished the back side relatively flat.

High spots on the back side knocked down:

Top side after polishing to the finest grit. There are just a few very small voids from air bubbles that were trapped in the mix.

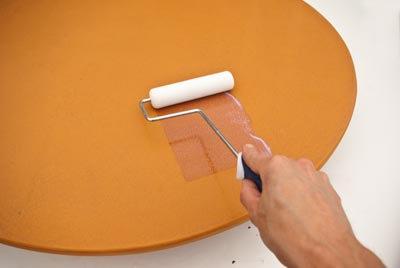
I went back and forth about sealing this tabletop, and also wasn’t sure what sealer to use. If it were unsealed, the top would stain very easily. I decided to go with a sealer from RJSC called TK6, in extra low gloss. The first coat of sealer is diluted with water, up to 30%, and is rolled on with a high density foam roller. This was my first time sealing a piece this big with the sealer and there’s a little bit of a learning curve. I didn’t get it to lay down smoothly, so there was still a bit of texture from the sealer. I applied a second coat after a few hours and then waited about an hour before burnishing it down to remove that texture. Then I put on a third coat, which laid down a lot more smoothly. I’ll let the sealer fully cure (48 hours) before trying to burnish the texture out and get the top very smooth again.


Some of the texture from the sealer visible on the edge:

It wouldn’t lay flat in the back of the car, so I cut a disc from the base board to make sure it didn’t break when transporting it home.

Got it home in one piece and placed it on the base to take these pictures. It’s heavy enough to stay in place, but I need to attach the shock mounts to the underside so I can bolt it to the base.


I cast the shock mounts for this table today, using stainless steel hardware so they won’t rust, and after a few days I should have them adhered to the base and it will be ready for final installation. I’ll smooth the sealer down with #0000 steel wool and burnishing pads and then secure the shock mounts with the same military grade adhesive I used to secure the mounts on the concrete side shell.