

This tabletop is made for an Eames contract table base and will be outdoors on the patio. The tabletop that came with this base is 36″ in diameter and is made out of MDF or something with a laminate surface that is an ugly marbled white / yellow (and weighs 24 lbs.). This top isn’t made for outdoor use, and would eventually swell over time from the water pooling on the surface. They make a few different tops for outdoor use, some of them are marble, others are slate. Either way they are expensive and heavy and hard to find, so I’m casting the top in fiber reinforced concrete. After doing some quick sketchup modeling (you can download all of these parts online), I decided on a color that would contrast with some blue side shells I picked up. The color I chose is one that we sell at work, called Amber. The size is 38″ in diameter and ends up being only 5/8″ thick. A tabletop this size will use one bag of mix, which is 50 lbs., and it should be small enough to easily transport home in the back of my car, and won’t be too heavy, which could cause it to tip over.

The chairs around the table are Indigo blue, and I plan to polish the top, which will give me the orange color below.

I’ve used a scrap piece of 3/4″ thick melamine, which has a few holes drilled in it. The first step is to roughly mark out the circle and then use trammels to scribe a mark in the surface so I make the top relatively round. The trammels attach to a 5/8″ thick piece of wood.


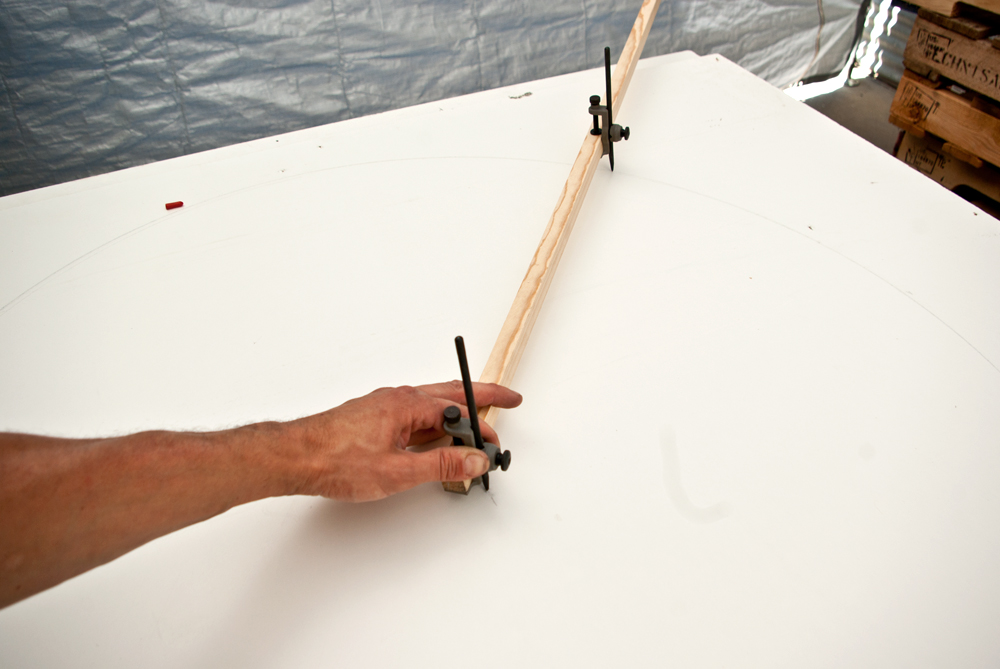
I drew over the line with a dry erase marker and rubbed it into the groove so it’s more visible. This helps to know where to place the form walls.

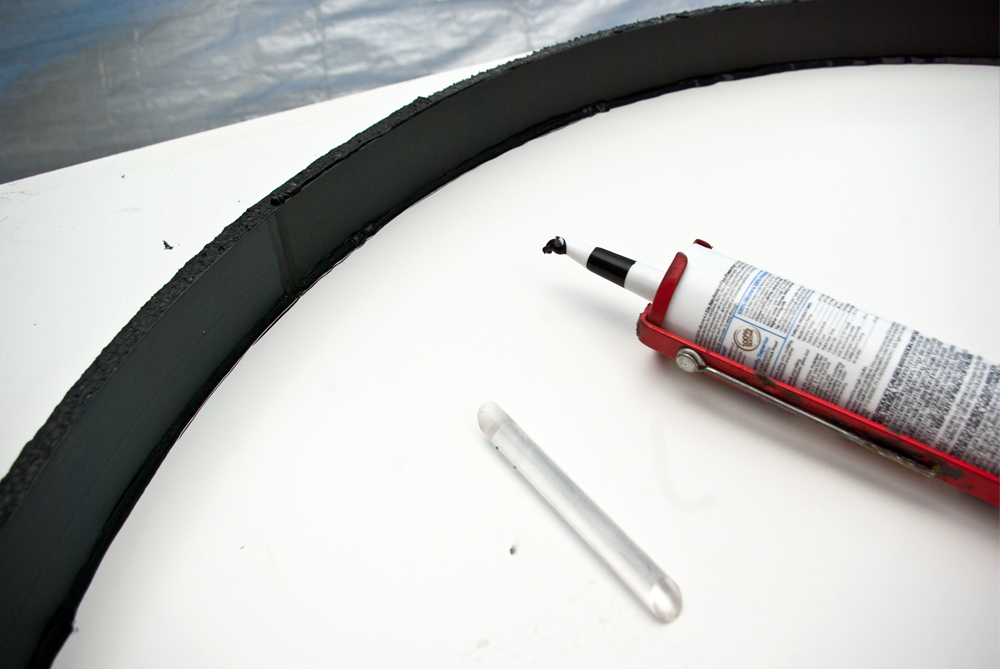
The form walls are stuck down with double sided tape. This is a foam forming system that we sell, but I had enough sticks to form it up, so it didn’t cost anything.


The form walls are stuck down to the tape, following the curve, and are screwed down every so often so they don’t move. A plastic form liner is stuck in place with spray adhesive. This will give the concrete a smooth surface around the edge.


A round over is created in the form using a bead of silicone caulk. This will give the top edge of the concrete a smooth radius.
Before casting, it’s important to make sure the form is level, otherwise the top won’t have a uniform thickness.

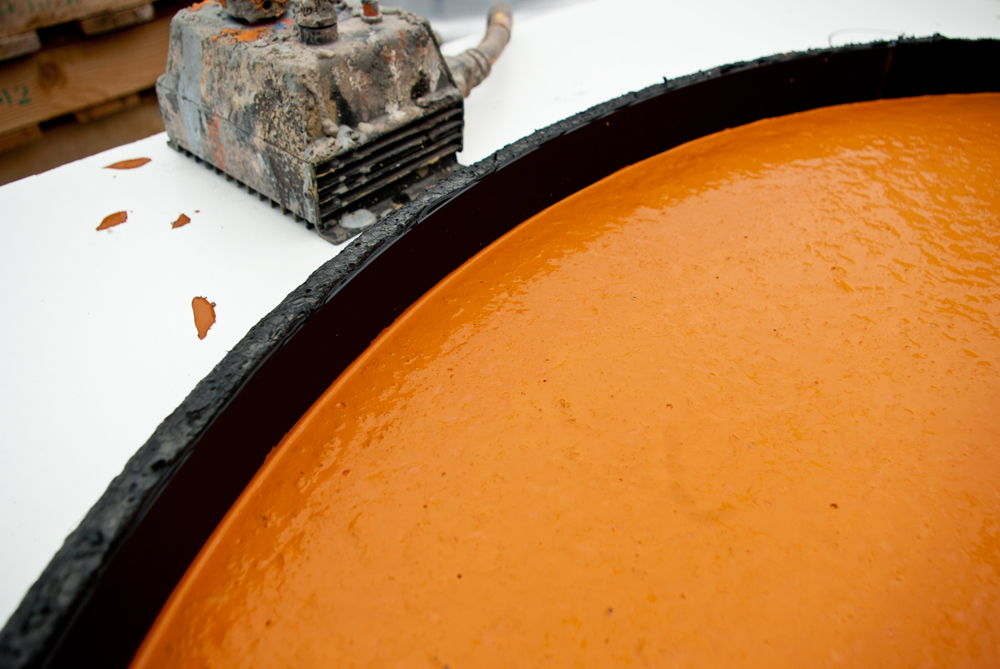
The table vibrators are screwed to the base board and will help drive out air during casting. This should minimize any air bubbles on the surface and help consolidate and even out the concrete when it’s poured into the form.

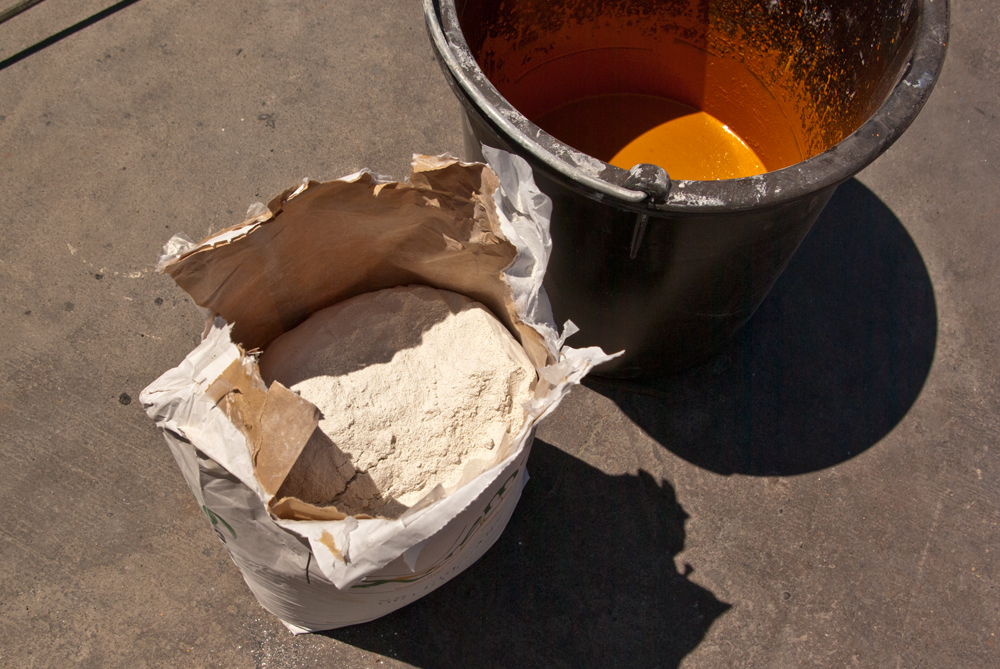
I wanted to minimize the cost of this tabletop, so I’m only using 50 lbs. of light casting blend (white cement), 1 gallon of precast modifier, and 1 bag of Amber pigment. The white cement will make the color more vibrant.

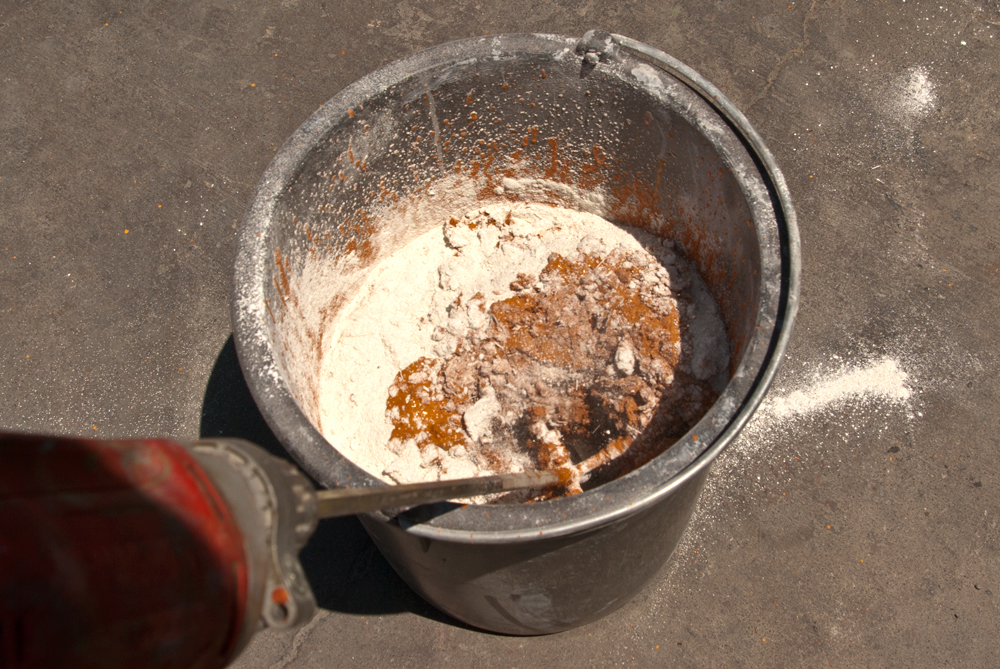
First you add the modifier to the mixing bucket, then you add the pigment and blend it together.


1/2 the bag of concrete is added and blended in. Then the rest of the bag is dumped in and it’s all mixed together with a 1/2″ corded drill and a paddle mixer. Scrape the sides and bottom of the bucket and continue mixing. Add additional water as necessary. We want the mix to be flowable, but don’t want to over-wet it.

Turn on the table vibrators and start dumping in the concrete. Smooth it out until the whole surface is covered. It’s hard to take pictures during this step because the camera gets covered in concrete when you’re doing this by yourself.

The form is filled and is relatively uniform in thickness (about 5/8″) but it’s a bit too thin. We’ll see how well it holds up as a table top. Hopefully it doesn’t crack when I take it out of the form and flip it over.

I’ll try to demold it tomorrow afternoon. I want to polish the back flat so it’s nice and uniform. Then I’ll flip it over, probably polish the top, seal it, and attach the shock mounts so it will sit on the base. The MDF top that I have just has holes drilled in it to screw into the base. Since this one is concrete, and pretty thin, I’ll make shock mounts to adhere to the underside, so it will fasten to the base, just like the slate La Fonda tabletop below (not my pic):

The contract base isn’t nearly that fancy, but you can see how the rubber shock mounts are installed. You can even see how the slate top was scuffed before the mounts were installed.