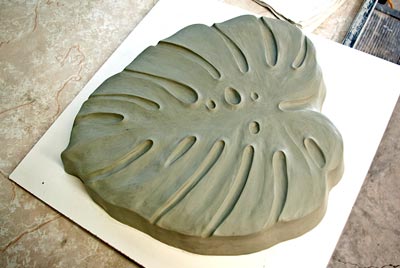

Here’s what I’ve been doing at work recently. In the past we created a series of stepping stone moulds for casting concrete, one of which can be seen here. Last time I made a computer file and the shape was cut out on a CNC router, which is great, but the shapes were very controlled, and this time we wanted to make moulds with a more sculpted look.
To do this, I first make a bunch of sketches to be reviewed. From there we decide on a direction to take, I do more sketching, and then begin working on the master that is used to cast the shapes that will be sent to the vacuum former. The drawing is scanned, blown up, and printed at full scale. This is traced onto 3/4″ plywood and cut out with a jig saw. The two pieces of plywood screwed together, for a combined thickness of 1-1/2″.

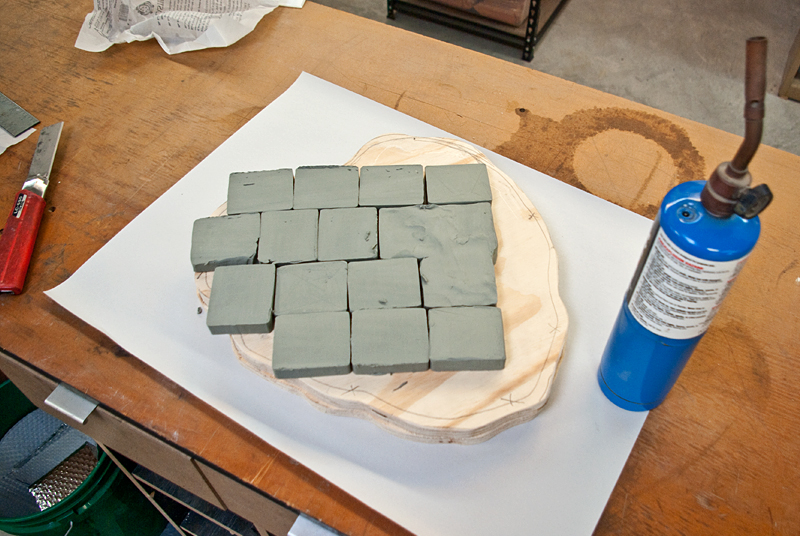
Sculpting the Master: This master is sculpted out of roma platstilina number 2, which is a relatively soft oil-based modeling clay that won’t shrink or dry out. The clay is cut into pieces that are 5/8″ thick, which results in a total thickness of 2-1/8″ when laid over the wood interior pieces. This leaves enough room to sculpt down and add material on the top for a final thickness of about 2-1/4″. The finished concrete piece will be pretty strong at this thickness, without additional reinforcement. Each piece of clay is scored on the sides and heated on the back side, then pressed onto the plywood interior. The top and sides of the plywood are coated with clay in this way and then it’s time to carve out the shape.
The top of the piece is scraped flat and the 1:1 template is traced into the clay, adding material on the sides where necessary.
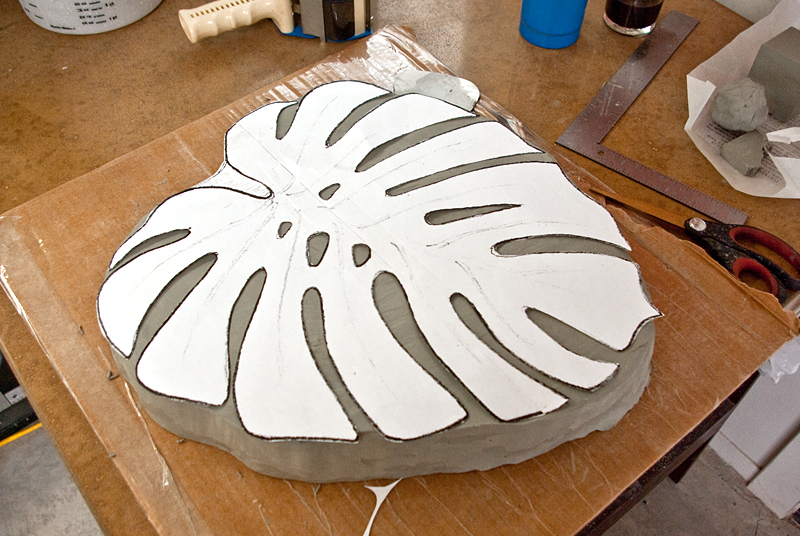
Sculpting begins with a few basic clay tools: a metal scraper, and some curved tools that I don’t know the names of. The first thing to do is to get the right draft angle on the sides of the piece. For vacuum forming plastic, you want about 5-7 degrees of draft so the plastic will release easily from the master. The draft angle is also important for removing the cast concrete pieces from the finished moulds. There can’t be any undercuts on the shape, or it will complicate things for everyone involved.
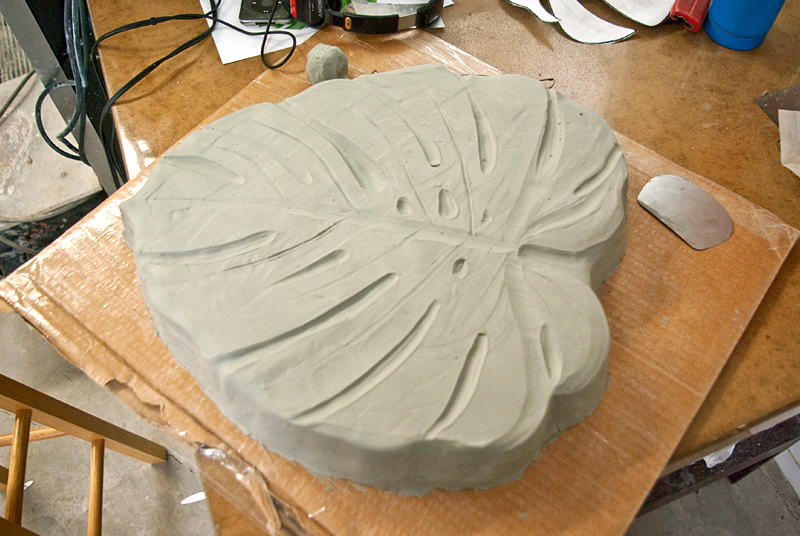
After a few hours of sculpting and staring out the window and listening to nice music, the piece is starting to take shape. To be functional as a stepping stone, it needs to be flat on top, and to have a nice finished concrete stepping stone, there shouldn’t be any sharp edges or thin edges in the design because they might crumble or chip too easily.
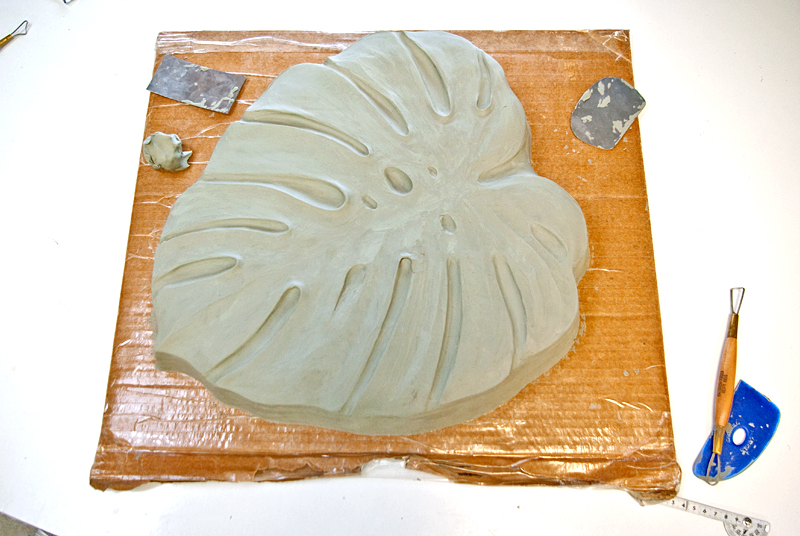
The final smoothing is done with my fingers, which leaves some fine lines that give the piece a little bit of texture. I experimented with smoothing the surface with acetone (this would be like smoothing normal clay with water), but it just made the surface gummy. I also hit some spots with a torch, which melts the plasticine a little bit, but this particular clay contains sulfur, which will crystalize when heated too much.

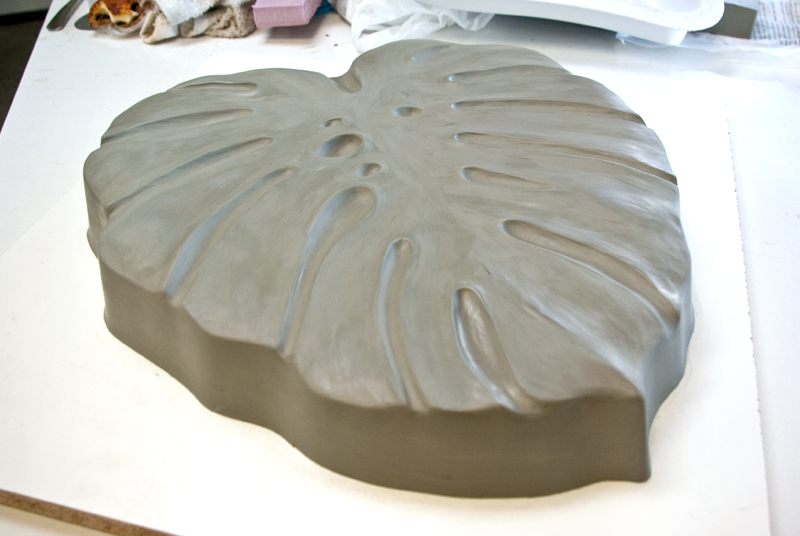
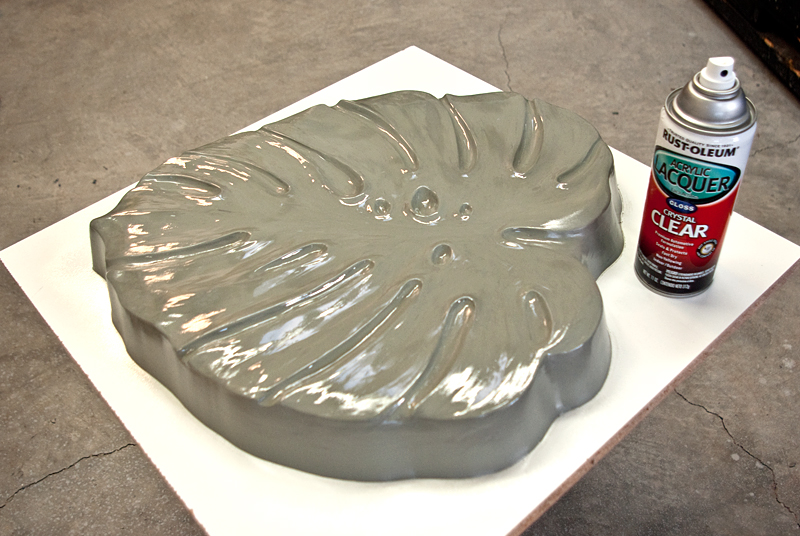
From this piece a master mould will be cast from polyurethane rubber. The sulfur in this clay will retard the set of silicone, but some tests showed that coating it isn’t necessary with polyurethane. Still, the piece was sprayed with clear acrylic laquer, just to be safe, but it also leaves a nice shiny finish.
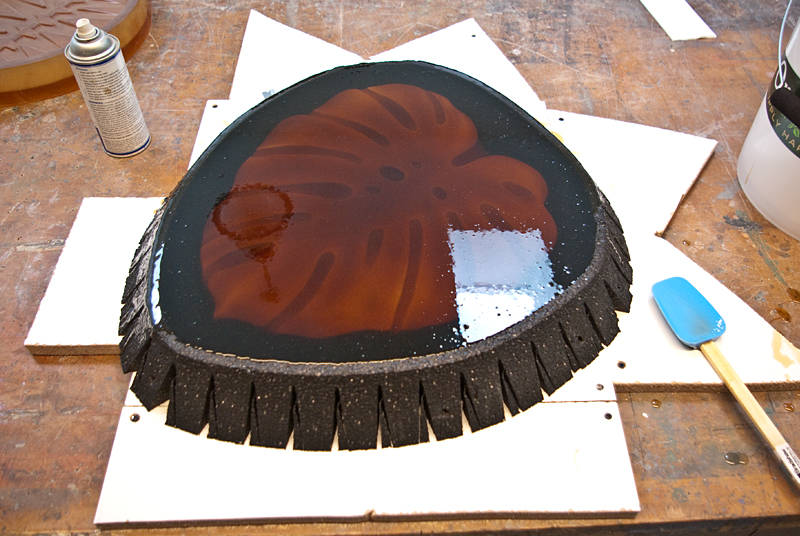
Casting a Polyurethane Rubber Mould: Somewhere up there, the piece was secured to a melamine-coated base board with screws from the back side. Some form walls need to be built to hold the rubber. For this I used some sections of foam that we sell for making curved concrete countertops. They are 2-1/2″ thick and are stuck to the base board with double sided carpet tape. The seams between the walls are filled with silicone to keep the mould rubber from squishing out too much. It’s very important that the clay piece is fully sealed against the base board. Any air that escapes from under it will create air bubbles in the rubber. Before casting, the piece is wiped off, the form is blown out, and everything is sprayed with a form release for casting rubber.

With the form ready to cast, the next step is to figure out how much rubber to mix. Based on the moulds we made before, I mixed up 15 lbs. of polytek 75-60 rubber. Detailed instructions for casting a rubber mould are online in this Instructable for the 4-legged Bent Concrete Side Table. The rubber has a part A and part B that are combined equally by weight. The rubber is first mixed in a 5-gallon bucket, then dumped in a second bucket to make sure no un-mixed material ends up in the form. It will stay in the form over the weekend, and will be removed on monday. The final step is to cast a few pieces for the vacuum former from an aluminized epoxy from douglass and sturgess, which is easily one of my favorite places to buy stuff in the bay area.
Until then.